Wednesday 17 April 2024

Defensive Positions for Stompy Robot Armies

After recently painting several English Civil War units, I felt the need for a change, something more imaginative and quick to do. We are preparing for our move to New Zealand later this year, which feels like an endless task, and as part of this mammoth tidy up I was dismantling an old outdoor table for disposal, when I chanced upon some plastic nut and bolt covers. 

The Blue Stompy Robot army a mix of Battletech and Warhammer Imperialis models. The recently created defensive positions are in the front. 

For whatever reason, the idea of defensive positions for the robot armies popped into my mind. I suspect wargamers are just naturally scanning for items they can repurpose for their games. After a quick wash and a rummage through my surplus Warhammer 40K bits box, I was able to create six defensive structures, three for each army. They are painted red and blue to tie in with the respective army colour scheme.

The nut and bolt cover and starting point for the defensive structures.

Defences for Red Army with a Battletech model for comparison.

Blue Army defences with two other models for comparison.

The next steps in my Stompy Robot project involve making a 2 by 2 foot gaming mat on which I will draw a hex grid, along with creating some futuristic and desolate terrain, buildings, and hills. You can find a brief overview of this project as I initially planned it here.


Friday 12 April 2024

Cheap out of ammunition markers for my ECW games

It seems my English Civil War forces are set to stay on the tabletop for another weekend, ready to test some ammunition supply tweaks to my D3 ECW rules. Previously, I have relied on individually based figures placed behind units to indicate units were out of ammunition. However, with the number of units in the armies expanding, I'm reluctant to paint up more individual figures as markers. Consequently, I have had to look at alternatives along similar lines to the cardboard casualty markers I use in my games.

I currently use paper and card marker for my casualties.

I decided to utilize powder barrels as markers, which seem quite appropriate for what they were indicating. After searching and finding a suitable image online, I took a screenshot and replicated it for printing. Once printed to the correct size I stuck the barrel images to some cardboard. I cut out and shaped the images using a pen to give them a rounded look, then added a touch of grey to the edges using a colouring pen for a nice clean looking finish. 

Shaping the barrels also has the advantage of making them easier to pick up.

The printed images are stuck to cardboard.

Once dry the barrels are cut out.

The cut out barrels are shaped to be curved.

I run a grey pen around the outside of the barrel to hid the lighter edges and any places where I did not cut very accurately.

I did consider making some powder barrels from wooden dowel but thought they would have a tendency to roll off the base. The paper and card approach is also much quicker to make and is consistent with my existing casualty markers.

An infantry unit marked as being out of ammunition.

I found a suitable unused container in the tool shed to hold all my English Civil War casualty and out of ammunition markers.

All the markers fit nicely into a container with partitions. The different coloured casualty markers represent a different number of hits.

Ammunition supplies.

I can track my available ammunition supplies on one of my supply cards.

Sunday 7 April 2024

Scenario #31 - An English Civil War Game Report

A brief recap. I am playing a scenario devised by Steven on his blog Sound Officers Call! It is called Scenario #31 - ECHELONED ATTACK. Although inspired by the Battle of Aspern-Essling (1809), my game is set during the English Civil War.

Bacground

A Royalist force, under the leadership of Lord Cedric Harrington has moved across the river Eldernorth into territory controlled by Parliament. To counter this unexpected move Parliamentarian forces under the command of Colonel Charles Ashcroft, have hurriedly organised their dispersed forces to attack the Royalist bridgehead from various directions.

At some point in the battle.

I have to admit I made a slight error regarding the reinforcement points compared to the original scenario. Somewhere between taking notes and setting up the tabletop, I inadvertently omitted a reinforcement point for Parliament. Hoping that my oversight didn't significantly impact the scenario, I continued with the game.

Tabletop setup.

Order of Battle…

A note regarding the order of battles. I allocated 9 points per army, where detachments of dragoons and commanded shot, as well as guns, are half a point each, while full units like infantry and cavalry are counted as one point each. 

Royalists force on the tabletop:

  • 2 x Commanded Shot
  • 1 x Infantry
  • 1 x Cavalry
  • 2 x Guns
  • 2 x Ammunition Supply Carts

Royalist forces in reserve:

  • 2 x Infantry
  • 3 x Cavalry
  • 1 x Ammunition Supply Cart

Parliamentarian force off-table:

  • 4 x Dragoons
  • 4 x Cavalry
  • 3 x Infantry
  • 3 x Ammunition Supply Carts
Note - Ammunition carts are used to resupply artillery and infantry units when they run out of ammunition. One cart can result one unit only.

Opening moves of the battle…

In anticipation of nearby Parliamentarian forces arriving, Lord Cedric Harrington deployed his available troops and guns in a defensive line stretching between the village of Oakfield and the hamlet of Little Yallop. Commanded shot units were stationed in Oakfield and Little Yallop, with a reserve cavalry unit positioned behind Oakfield.

The Royalist defensive line and reserve cavalry wait for the Parliamentarian forces to arrive.

Assault on Oakfield…

The Parliamentarian forces, consisting of dragoon detachments and cavalry, initially arrived to the west of Oakfield village. In response, the Royalist reserve cavalry swiftly charged Parliament's cavalry, while the dragoons began their assault on the village. Meanwhile, the Royalist artillery were proving highly effective, delivering accurate and relentless fire on the Parliamentarian infantry who were advancing from the north to reinforce the attack on Oakfield.

The initial assault on Oakfield village.

The Royalist cavalry, after a delay, arrived just in the nick of time to witness the fall of Oakfield to the enemy assault. Without hesitation, they spurred their horses onward, charging into Parliament's cavalry to the west and others moved to reinforce the defensive line, which was starting to retreat in the face of  overwhelming numbers.

Royalist cavalry reinforcements arrive just in time.

The Royalist defensive line is stabilised as reinforcements move into position.

Attack on Little Yallop…

As the Royalist forces worked to reorganise their defensive positions and reclaim Oakfield amid some fierce fighting, the battle intensified in and around the hamlet of Little Yallop. Parliamentarian troops began to arrive from the northeast along the road, sparking fierce clashes. Parliamentarian dragoons spearheaded the initial assault on Little Yallop supported by their infantry. In response, Royalist cavalry made a decisive charge, routing not only the infantry, but pursuing some of the dragoon detachments to  provide some relief for the commanded shot defending Little Yallop.

Royalists stabilise their defensive line and attempt to retake Oakfield.

Royalist cavalry successfully see off some Parliamentarian cavalry, then charge off after them.

The attack on Little Yallop heats up as Royalist cavalry make a charge to relieve the situation.

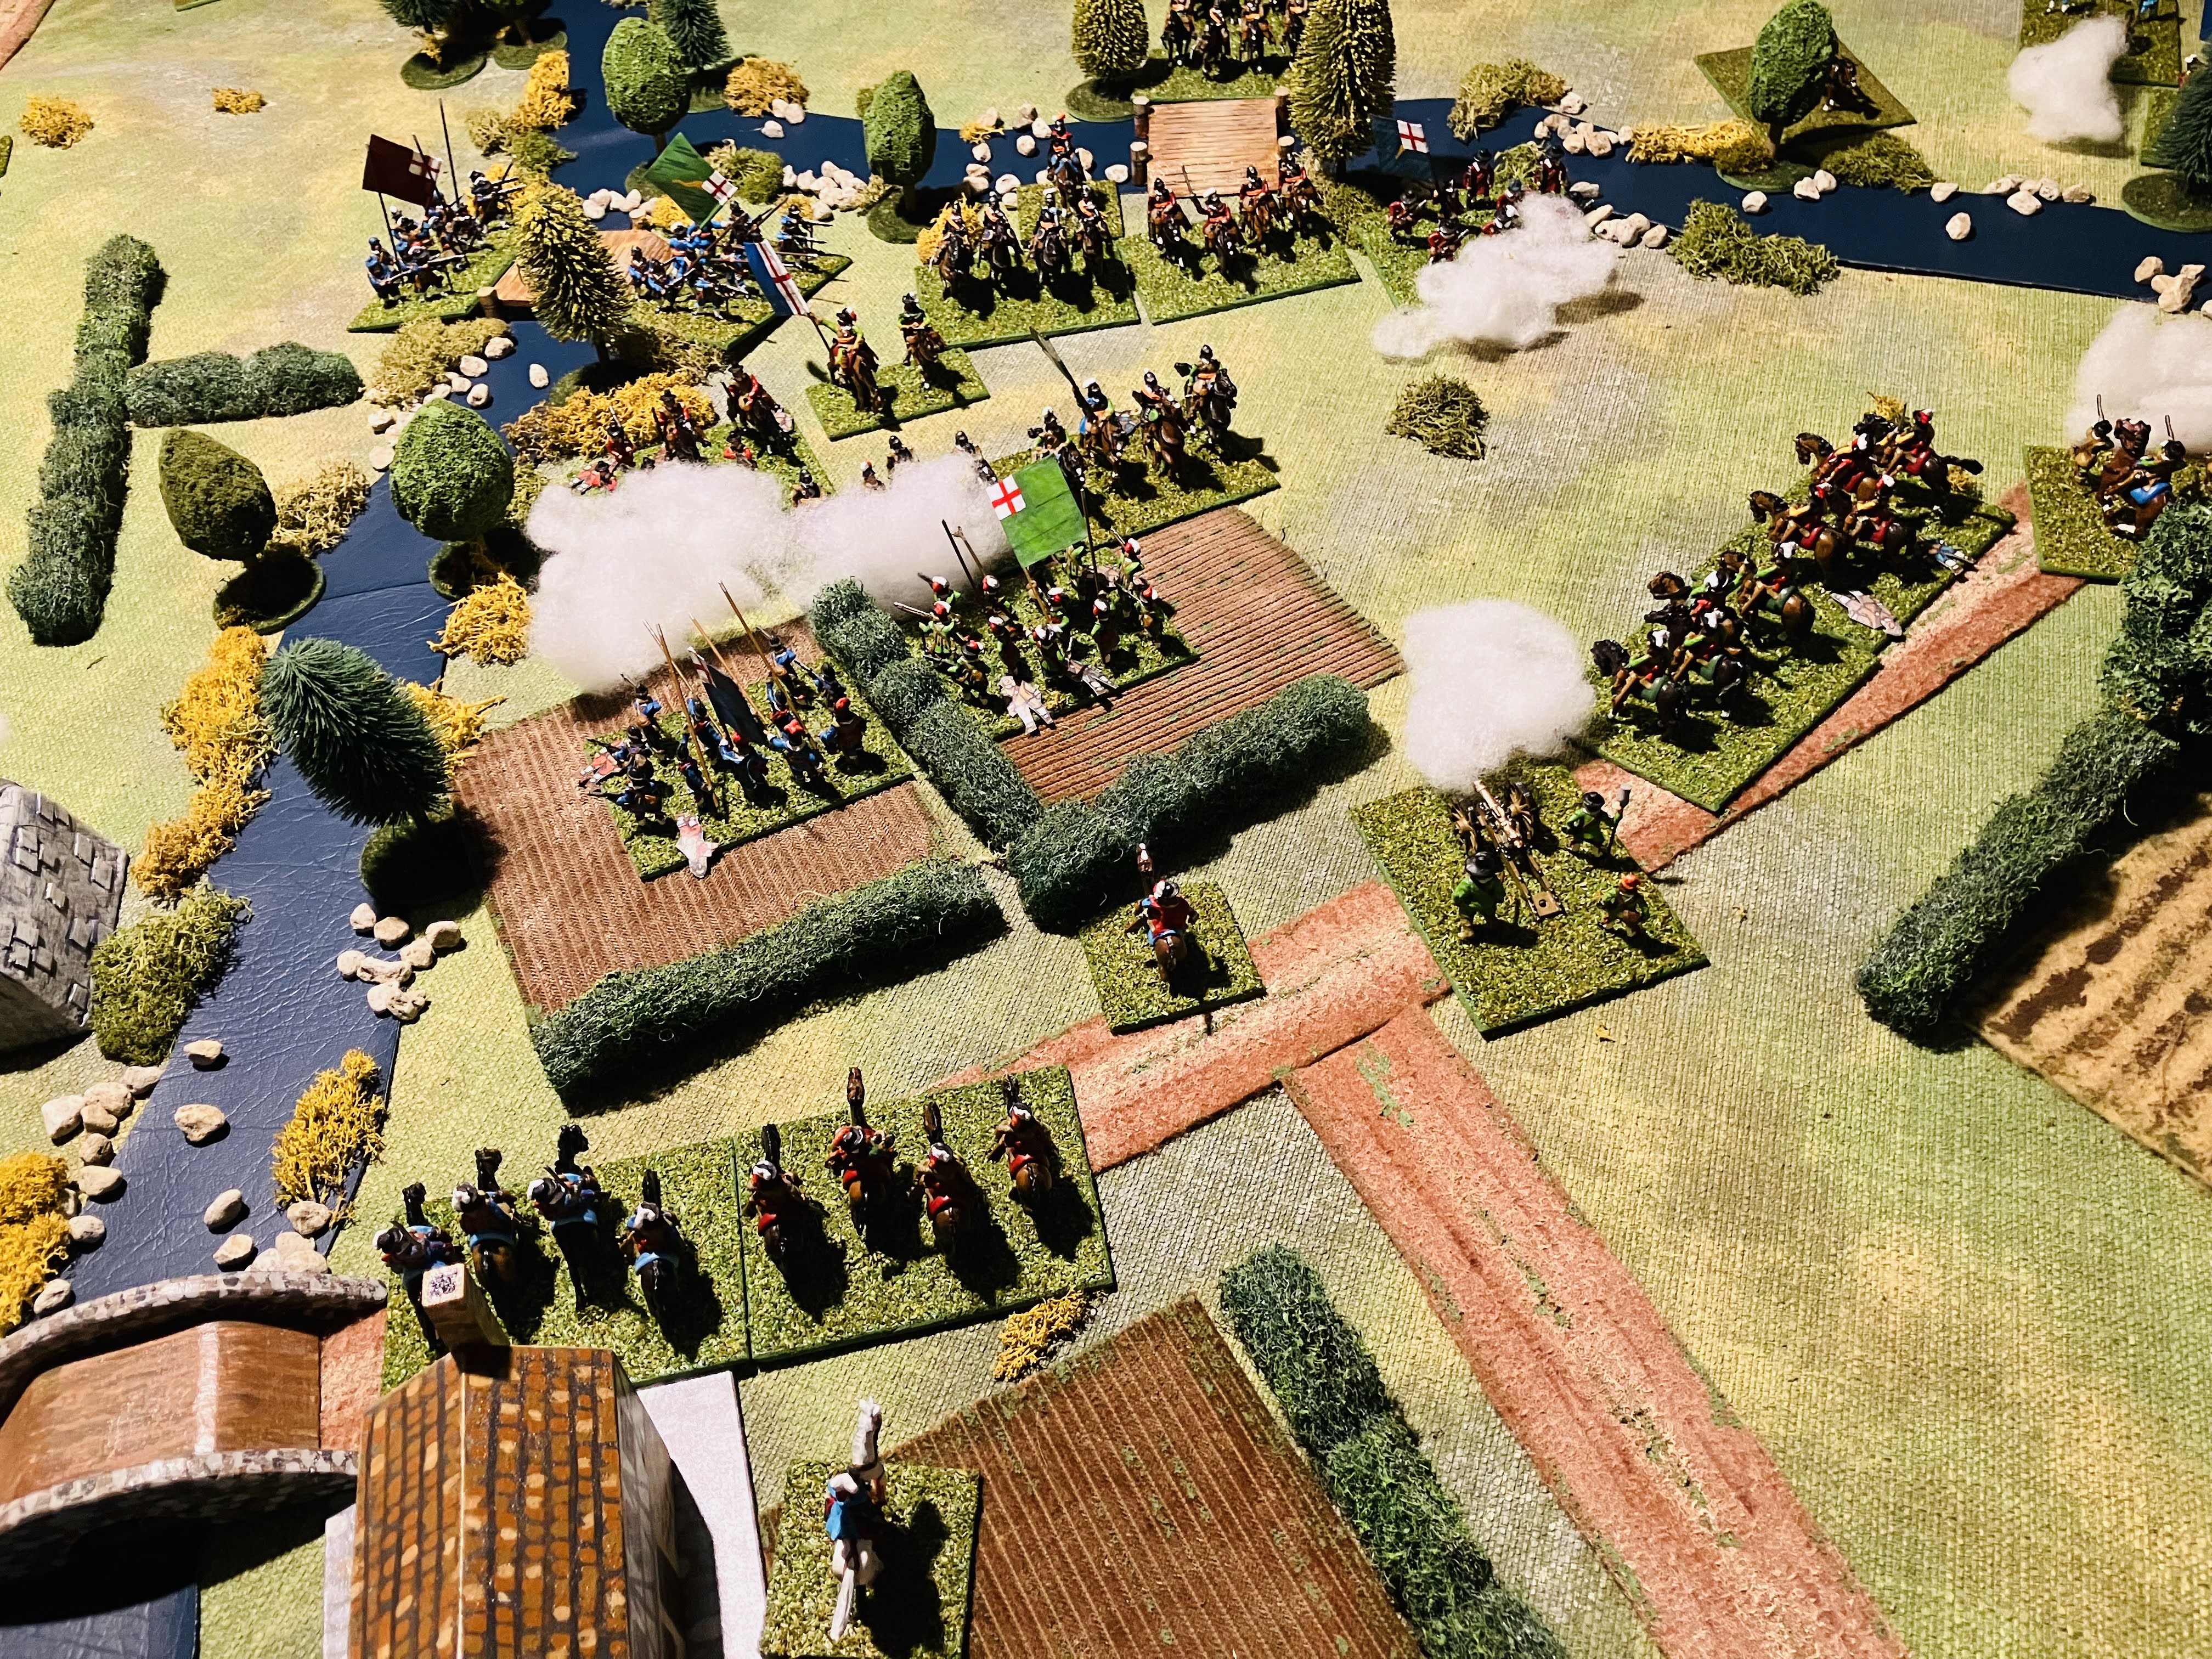
Height of the battle…

At the height of the battle, both commanders were frantically throwing any available reinforcements into the engagement to secure control over Oakfield and Little Yallop, pivotal points in the battle. Despite numerous assaults, Parliament were able to maintain control around Oakfield, with dwindling units on both sides as the fierce fighting had taken is toll. Meanwhile, to the east, additional Parliamentarian cavalry arrived, successfully routing the troublesome Royalist cavalry who's gallant charge had undoubtedly saved the defenders of Little Yallop.


The battle for Oakfield at is height.

Parliamentarian forces are able to retain control of Oakfield.

The timely arrival of Parliamentarian cavalry are thrown into battle.

The Royalist cavalry are routed while the defenders of Little Yallop watch on.

The final assault…

In a final attempt to recapture the village of Oakfield, Lord Cedric Harrington, the Royalist commander, rallied his remaining infantry for one last assault. The attack nearly succeeded in dislodging Parliament's infantry, but ultimately failed as enemy cavalry intervened, routing this final Royalist assault and their commander.

Note - the final assault was one of those anything but a one situations, and then a one is rolled.

The Royalist infantry are rallied and make a final assault.

Parliamentarian defenders just hold on long enough for their cavalry to arrive.

The Royalist infantry and commander are routed.

Who won?

At the end of the game, each army maintains control of one of their objectives, Oakfield village and Little Yallop hamlet, but the Royalist commander suffered a rout and left the field of battle. Hence, I am declaring a marginal victory for the Parliamentarian forces.

Steven’s scenario provided a most enjoyable weekend game. Link to post and scenario - here.

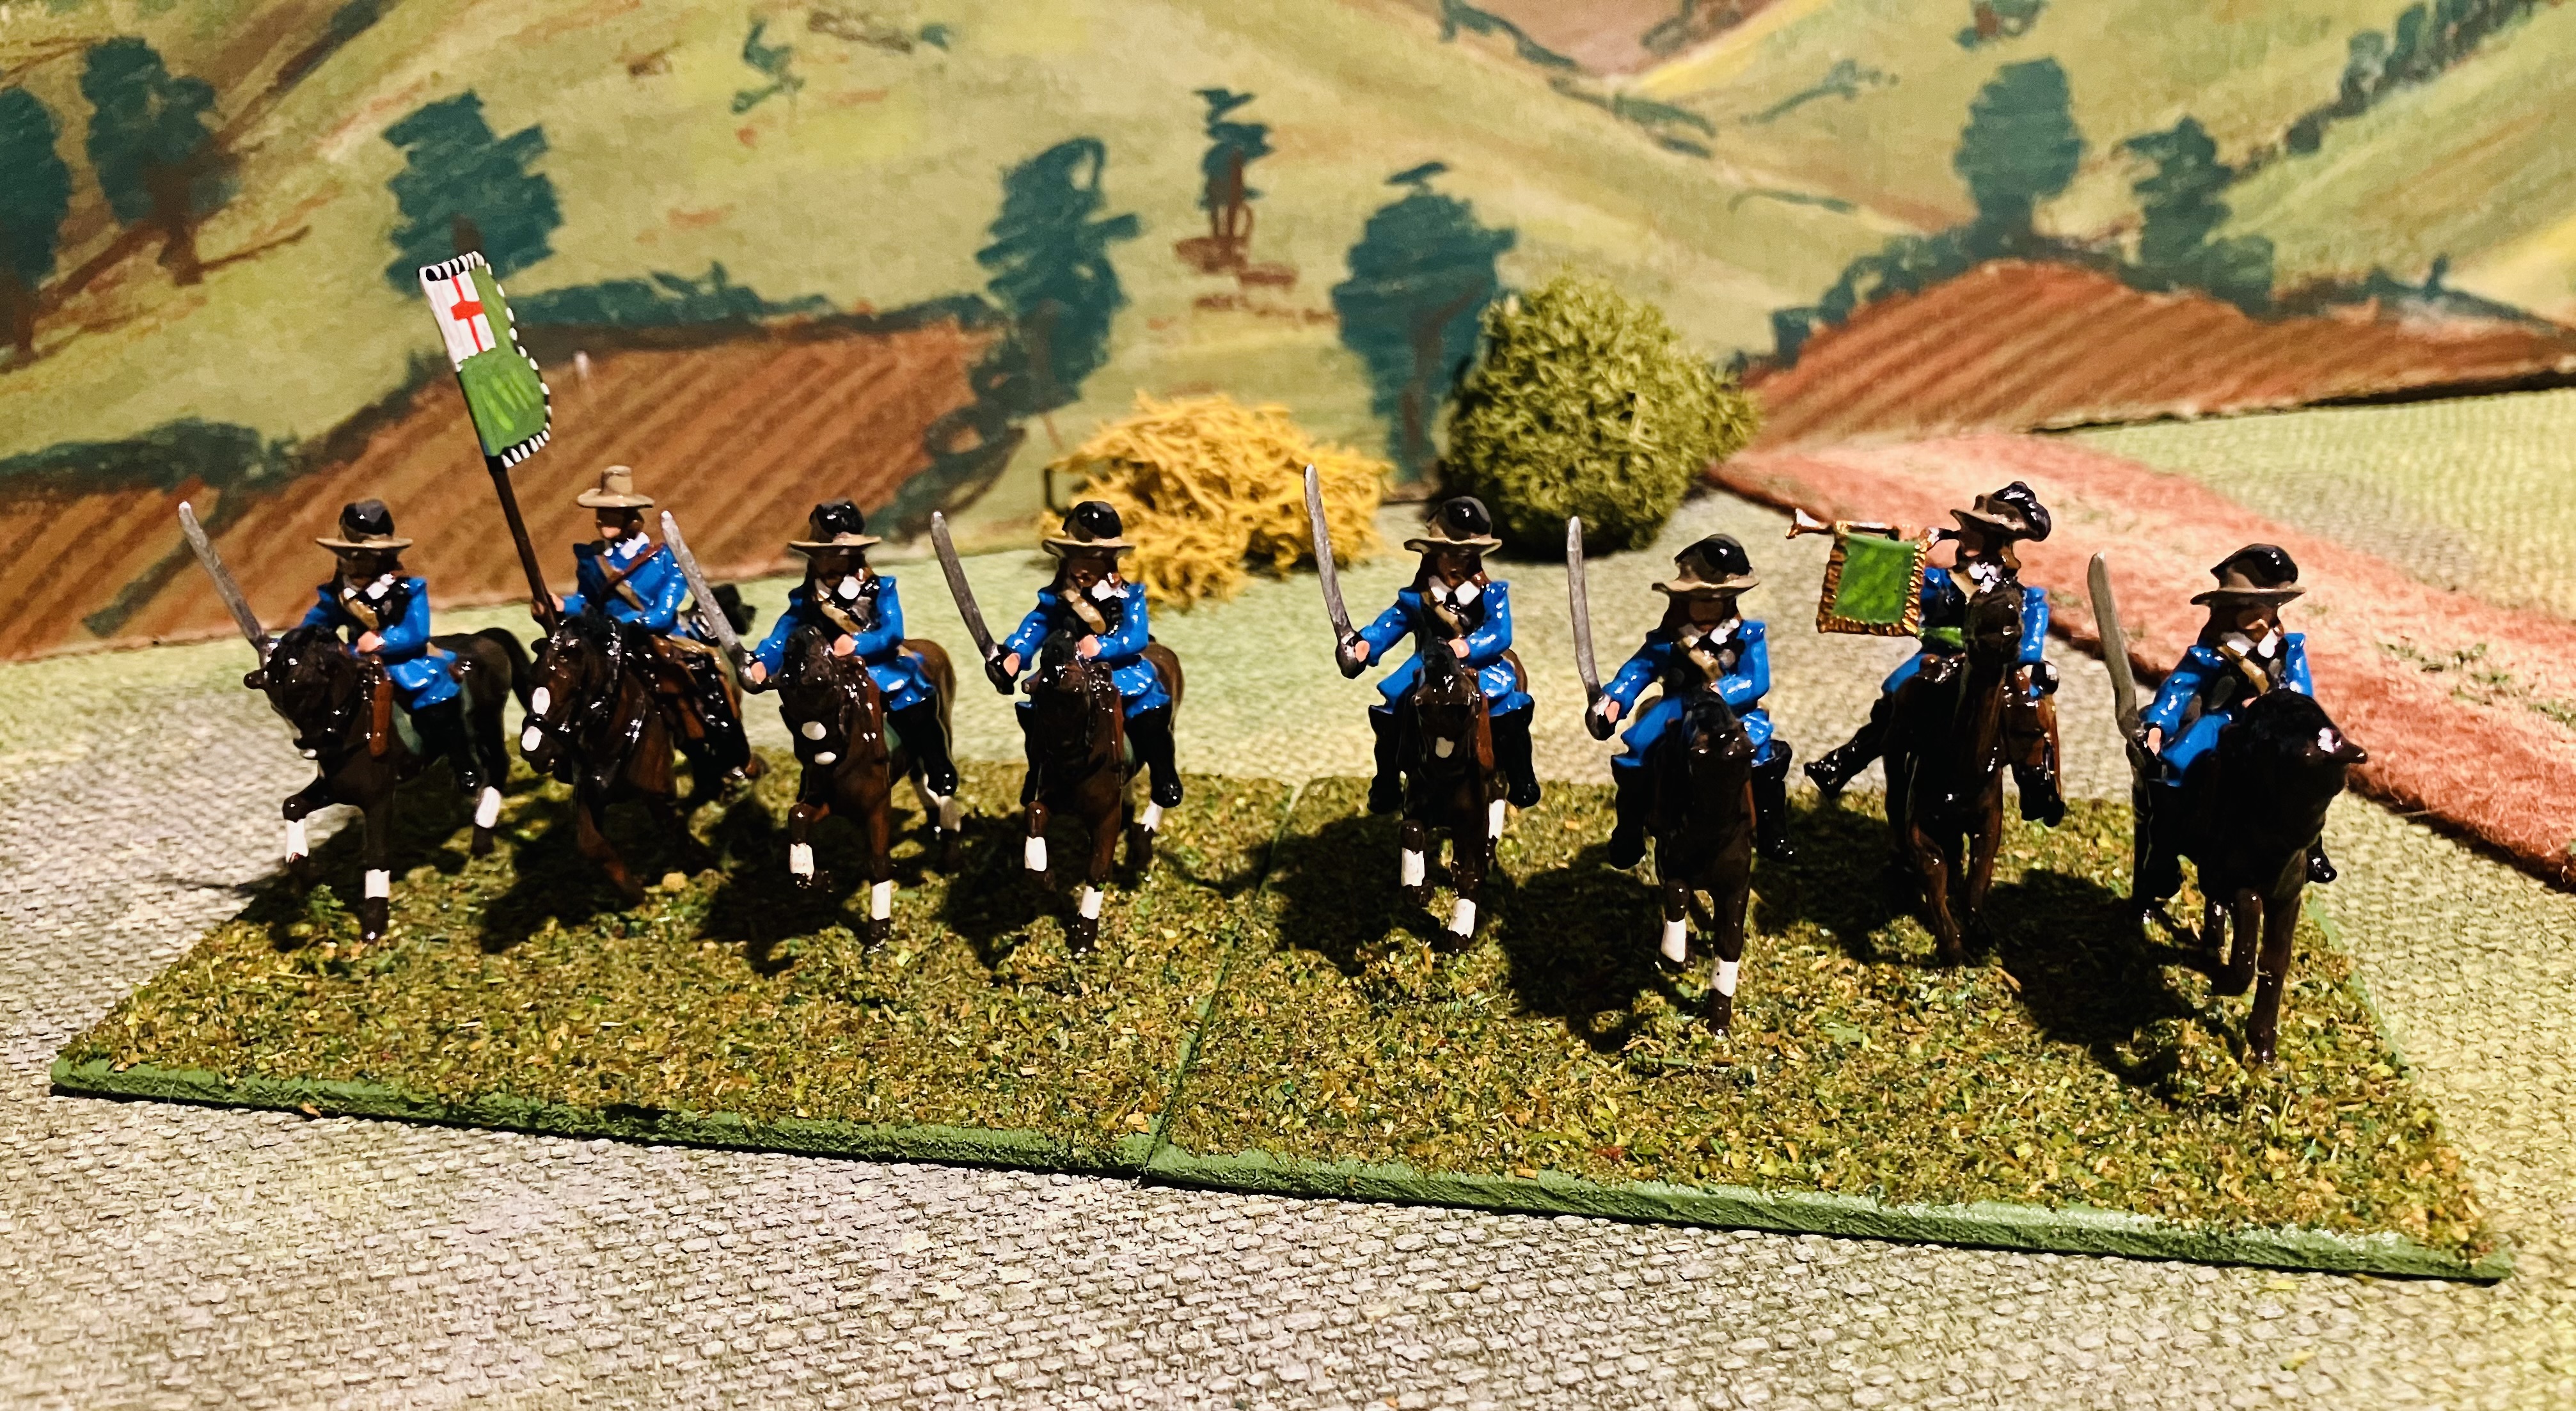
A final note - my newly painted Royalist cavalry performed well, unlike the usual trend where new units often struggle on the tabletop.


Thursday 4 April 2024

An ECW game trying out a new scenario

While I have spent a fair amount of time at the tabletop lately, I have not neglected the painting side of the hobby. In the past few days, I've completed the first of several units aimed at expanding the armies in my English Civil War collection. I am planning to bolster both my Royalist and Parliamentarian armies by two additional infantry and cavalry units for each side, allowing for a total of six infantry and six cavalry units per army when required. This expansion has been enabled by the purchase of some reasonably priced second-hand figures, all of which I have already cleaned up and prepared for painting. Most of the figures belong to the Miniature Figures range, but there are a few Hinchliffe models scattered throughout. Although my current collection mainly consists of Hinchliffe figures, I am always happy to adding different ranges into the mix, especially if they are older model ranges which I generally find are easier to paint and look good with a gloss finish.

Miniature Figure cavalry with a couple of Hinchliffe figures, a converted dragoon holding a flag and trumpeter.

I have also made some additional casualty markers in yellow to add to the red and blue markers I had previously made (see here). Each colour represents different number of hits. I prefer the look of this cardboard casualties as an alternative to employing counters. The additional colour was suggested in comments (thank you) and helps to reduce the number needed to track hits which is up to 8 on my units. 

Casualty markers

A unit with 5 hits - yellow casualty (4) and blue casualty (1).

After painting a new unit I am always keen to get them onto the tabletop so it is time to set up a game for this weekend. I decided to use the Scenario #31 - ECHELONED ATTACK posted on the blog Sound Officers Call! The scenario has been created in the One-Hour Wargaming style and uses the battle of Battle of Aspern-Essling (1809) for inspiration.

The setting for my English Civil War game based upon the above scenario.

The vanguard of a Royalist force, under the leadership of Lord Cedric Harrington, a revered figure among Royalist ranks, has moved across the river Eldernorth into territory controlled by Parliament. To counter this unexpected move are Parliamentarian forces under the command of Colonel Charles Ashcroft, renowned for his steadfast dedication to the cause, earning him the admiration and respect of his comrades. Rather than opposing the Royalist crossing, Colonel Ashcroft has allowed them to establish a limited presence on the far bank. Meanwhile, he has hurriedly organised his dispersed forces to attack the Royalist bridgehead from various directions, aiming to isolate them from potential reinforcements and rout them.

Parliamentary units will arrive from points A, B, and C. Royalist reserves will arrive from point D.

Aware of nearby enemy forces Royalist units take up defensive positions between two villages.

So the scene is set for this weekend’s game.

Saturday 30 March 2024

A brief review of Arrowstorm rules and battle report

I recently purchase the Arrowstorm medieval rules written by Daniel Mersey, better known for his work on the Lion Rampant rules. These rules are available at a reasonable price ($9.47) on Wargame Vault under the publisher "Daniel’s Game Emporium". You just have to download and print. The design notes which are many, tabletop setup, rules, army lists, and quick reference take up 34 pages.

What caught my interest in these rules was the activation system which uses a tactics chart, and they are intended for a fast play game. Interestingly, the rules themselves were based upon some rules used for recreating the Battle of Evesham, 1265, and published previously in Military Wargames magazine (issue 387). These are also included in the 34 pages.

The tabletop prepared and the armies deployed.

The rules downloaded and printed. There was only one colour page, the rest being black and white and not heavy on the use of ink. 34 Pages in all.

The rules use an offset grid, with each square needing to accommodate up to 6 units (3 friendly and 3 enemy units). Initially, this posed a challenge for me as my units were based on two 4-inch by 3-inch stands and I play on a 6-foot by 4-foot tabletop. After experimenting with various approaches and square sizes, including halving my units to a single stand within the grid, I ultimately decided to adopt a free movement system. This meant that units needed to operate in a cohesive block with other units, so 3 units operating together were placed one behind each other. On the tabletop this gave the impression of the armies being organised into battles, provided a medieval look to the game.

The game uses an offset square grid. But I was able to adjust the rules to use free movement as my unit basing was too large to really accommodate up to 6 units in a square.

The deployed armies into blocks (or battles). Most of the blocks have 2 or 3 units.

The main reason behind my purchase of this Arrowstorm was its activation system, which revolves around a tactics chart. This chart comprises 12 tactical options, such as movement, battling, shooting, etc., with players taking turns to select their preferred tactic. Additionally, the inclusion of a couple of special tactics unique to each army list adds some characteristics to the armies; for instance, "arrowstorm" is a special tactic for the English Hundred Years War armies giving a bowmen unit extra benefits when shooting. 

Players are limited to choosing a maximum of 4 tactics in most cases. I found the whole tactical chart mechanism most enjoyable and intriguing, for example:

  • Selecting the “seize the initiative” tactic, allowing you to activate a unit or group of units first, but at the expense of an activation. 
  • Choose a tactic that might not directly benefit your army but by selecting it will hinder your opponent's choices.

The other feature of note are that activations apply to the square containing the units, not the individual unit, although you can just activate one unit if you choose to do so. For my game the activation is applied to groups of units. Units or groups of units can be activated more than once during a game turn, so units may end up shoot or moving twice.

Tactics being selected on the tactical chart. Generally 4 tactical are selected, but this can be reduced or increased in certain situations.

The combat mechanics are straight-forward, each unit type has an assigned a battle rating which dictates the number of combat dice rolled. Battle rates are reduced as units accrue hits. Typically, groups of units in a square engage in combat rather than individual units. In most cases players are allowed to allocate any hits among their units as they see fit. Moreover, special tactics and commanders have the ability to increase or decrease the number of dice rolled in combat. 

A Battle report…

Arrowstorm provides rules and army lists with a unit point system for a player to select their army and setup the tabletop. For this test game the following order of battle was used.

French:

  • 2 x Mounted Knights
  • 2 x Mounted Sergeants
  • 3 x Crossbows
  • 1 x Foot Knights
  • 2 x Spears

English:

  • 1 x Mounted Sergeants
  • 3 x Longbows
  • 3 x Foot Knights
  • 2 x Spears

The French were formed into 4 battles with cavalry positioned on each flank and the English into 3 main battles with a single units of mounted sergeants on their left flank.

The initial deployment. The English army is deployed in front of a town.

Turn 1 - The French seize the initiative, pushing forward their mounted knights along with one of their central battles containing two crossbow units. Volleys of arrows are exchanged, resulting in a hits allocated across the units within each battle. (Note - the English seized the initiative for the next game turn.)

Turn 1 - both sides advance.

Turn 2 - After seizing the initiative, the English unleash an arrowstorm upon the French mounted knights, inflicting casualties, although the knights persist in their charge. Nevertheless, significantly weakened, they are eventually eliminated at some cost by the English battle comprising archers, spearmen, and foot knights. On the opposite flank, the French commander leads his troops forward, resulting in a swift clash with the opposing English battle, with casualties being sustained on both sides.

Turn 2 - The French mounted knights are eliminated while two battles engage in melee.

Turn 3 - The French commander leading his troops successfully eliminated the opposing English battle in melee, all the while both armies continuously showering their opposition with arrows. The English make no manoeuvres, opting instead to focus on rallying their troops.

Turn 3 - The French right battle eliminates an English battle.

Turn 4 - The English army was happy to persist in shooting with their remaining bowmen, while the French, somewhat belatedly, advanced their mounted sergeants and engage in some rallying efforts.

Turn 4 - The French try an reorganise and bring up their mounted sergeants while under constant shooting by the English bowmen.

Turn 5 - Observing the battle's momentum was favouring the English and their defensive strategy, the French commander initiates an assault with his significantly diminished battle. However, the opposing English battle, under the leadership of their commander, easily repels the impulsive attack. Witnessing their commander's downfall, the French forces withdraw, conceding victory to the English.

Turn 5 - A final assault by the French is not successful and the English triumph this day.

A most enjoyable first game and all completed after 30-40 minutes.

Thoughts on the first game…

I found the tactical system to be most enjoyable as it introduces a planning aspect to the start of each game turn.

Following a single play through, referring to the rules became minimal, aside from checking on the  special tactics.

The use of free movement and unit groups appeared to work. One restriction I implemented was that when a group of units is in contact with another group (similar to opposing units occupying the same square in the rules), you can only add to your group if it comprises fewer than 3 units, and flanking or rear attacks are not permitted. Similar to squares, this requires careful consideration of the unit composition within your groups (battles).

The combat mechanics, both shooting and melee, are straightforward and abstracted (as stated in the game’s design notes). However, they tend to result in rather bloody and decisive encounters with few prolonged engagements. This can give a significant advantage to units striking first. Although, if so desired, the rules could be easily be tweaked to provide less decisive outcomes.

The tactics chart, particularly its restriction of activations, compels players to maintain their units grouped into cohesive battles. Dividing units too thinly can result in a significant portion of the army remaining inactive in the game, and if attacked they would put up little resistance. 

I found these to be a very interesting set of rules, particularly the tactic chart rule mechanism, all in all very clever. The set of rules is part of the “You Command” series of rule by Daniel’s Game Emporium which offers other period Dark Ages and WW2 using similar tactical chart approaches.

It is very tempting to get some 6mm or 10mm medieval figures and create a small footprint game for the dining room table. Says me reaching for the credit card.

Friday 22 March 2024

Battle of Worcester 1651 Battle Report

Last night I finally got around to playing the Battle of Worcester, 3rd September 1651. The scenario was set up on the tabletop a couple of days ago (see previous post for details). For the game rules I opted to stick with the D3 rules I mostly use. These can be found here or via one of the tabs at the top of the blog. I made a couple of adjustments, granting all cavalry a combat value of D3+1, and removing the impetuous status from both cavalry units.

A closer view of the action during the game.

Order of Battle

The order of battle was as follows…

Royalist
3 x Infantry
2 x Cavalry
2 x Dragoons and Commanded Shot
2 x Artillery
4 x Commanders (led by Charles II)
2 x Ammunition Supplies

Parliament
4 x Infantry
4 x Cavalry
3 x Dragoons and Commanded Shot
2 x Artillery
4 x Commanders (led by Cromwell)
3 x Ammunition Supplies

I use a variety of carts to track ammunition provisions. With each instance of a unit running out of ammunition, a supply cart is withdrawn. Once all carts are removed, units that exhaust their ammunition will be unable to shoot. Using the ammunition supply rule removes the likelihood of infantry units running out of ammunition during the game's initial turns.

Deployments

The city of Worcester sits beside the River Severn running across the tabletop and is joined by a tributary, the River Teme, which can be crossed by Powick Bridge. The Parliamentary forces are positioned across the River Teme and overlooking Worcester from Red Hill, they have commandeered local boats to construct two platoon bridges over both rivers.

The defending Royalist forces are divided into two groups, one command occupying Worcester and the nearby Fort Royal; the second command is guarding against potential Parliamentarian attacks across the River Teme.

A top down view of the tabletop with the bridges in place where the Parliamentarian forces impounded boats to build bridges to cross the River Severn and River Teme.

I am expecting this to be a one sided game with a historic outcome. From a game perspective the objective of both armies is to destroy the enemy. The scenario from “With Pike and Musket” by C.F. Wesencraft, from which this scenario is taken, suggests the Royalists should hold their ground for six turns after which it may retire, but no victory points for a successful retirement.

The game report

As the battle commenced, Parliamentarian forces launched their initial assaults on Worcester from Red Hill and at Powick Bridge. Cannons roared from both sides, exchanging fire as thick clouds of gunpowder smoke billowed from Worcester's defensive emplacements. Meanwhile, the first pontoon bridge was swiftly constructed, enabling some dragoons to cross the River Severn and begin establishing a bridgehead. Soon after, a second pontoon bridge was completed, allowing for the crossing of forces across the River Teme. However, upstream at Powick Bridge, Royalist infantry staunchly resisted, repelling the attacking Parliamentarian units and inflicting heavy casualties upon them.

A view from Fort Royal at the Parliamentary forces attacking Worcester from Red Hill.

The first pontoon bridge can be seen constructed and allowing forces to cross the River Severn. In the distance the battle is raging at Powick bridge.

Royalist forces in the centre move to engage the bridgehead.

Although the Parliamentarian units encountered strong resistance in their attacks on Worcester, they started to secure a bridgehead to the north of the river Teme as their forces rapidly crossed the two pontoon bridges. Soon, clashes erupted between Parliamentarian and Royalist units and battle lines were deployed between the Severn and Teme rivers. Valiant commanders from both sides spurred their troops onward, rallying hesitant infantry and launching cavalry charges against the enemy. With the constrained space available, the Royalist forces initially maintained their ground, inflicting considerable damage upon their enemy. However, the numerical superiority of the Parliamentarian forces, who continued to cross the rivers, gradually wore down the Royalist defenders over time.

The fighting was fierce around the bridgehead north of the River Teme.

Casualties begin to mount for both sides as Parliamentarian forces try to breakout from their bridgehead.

As the Parliamentarian assaults intensified, the Royalist forces found themselves in a precarious position, compelled to withdraw, relinquishing control of Powick Bridge. With their battle lines weakened from casualties, this prompted the positioning of their reserve cavalry to counter any potential breakthroughs by the Parliamentarians. Soon, these reserves would be pressed into action as Royalist lines began to crumble under the numerical superiority of the enemy. With all their reserves fully engaged, the Royalist forces teetered on the brink of collapse, holding on by a mere thread.

The Royalist battle lines are looking rather thin as reserve cavalry prepare to plug any gaps.

The attacks continue on Worcester.

Royalist cavalry about to charge in an attempt to hold back the advancing forces.

In a simultaneous turn of events, the breaching of Worcester's defences and the routing of the Royalist forces guarding the River Teme occurred. The resolve of the Royalist army was shattered, leaving them with no prospect of victory. Charles II, accompanied by a small contingent of senior Royalist officers, managed to evade capture. they would evantually make their way to the southern coast to board a ship bound for France. Charles II remained on the Continent until the Restoration in 1660.

Parliamentarian forces breakthrough north of the River Teme.

A final Royalist stand in Worcester eventually fails and the defences are breached.

Victory to Parliament.

Summary of game

The chances of victory for the Royalist player in this scenario appear slim. At most, they might salvage a draw should the Parliamentarian player fail in establishing one or both pontoon bridges. Despite the scenario imbalance, playing the game was enjoyable, and it is one I am likely to replay this coming weekend. In the next game I will relook at the victory conditions, and whether the Royalists can gain victory if they manage to withdraw successfully after a specified number of turns. Trying to pick the exact number of turns is always challenging and is so dependent upon the decisiveness of the combat rules used.

Another area I am thinking of exploring, if I get to replay, is to have a go at simplifying the scenario to a One-Hour Wargaming (OHW) format. I always find comparing the OHW scenarios to the original ones they are referencing so fascinating, and seeing how the terrain and tabletop layout has been simplified or opposing forces reworked to fit the limited numbers of units used.